Afternoon storm risk is the line that matters. Everything else is comfort. In summer, plan to be off the ridge before the build-up starts, not as it starts. Forecast for the summit point, adjusted for its elevation · data from Open-Meteo.
Centennial 13er · East Ridge
Overview
Mount Ouray is the big, lonely summit at the south end of the Sawatch Range. From the east you climb out of the Grays Creek drainage through forest, then leave the trees and walk a long ridge west to the top. The deep cirque known as the Devil's Armchair cuts into the mountain beside the upper ridge and gives the peak its shape from the valley.
The route is Class 2. There is no exposure and no scrambling, but much of the upper mountain is off-trail tundra, broken rock and talus. The ridge is broad and wide open, so you are exposed to wind and lightning for a long time. Once you are on the ridge there is nowhere quick to hide.
Plan on 7 to 9 hours for the 9.3-mile round trip and about 4,300 feet of gain. It suits fit hikers who are comfortable walking on rock without a trail and who can judge weather on their own, since this side of the peak sees far fewer people than the 14ers to the north.
Plan of the day
Start by
By 5 a.m. You spend three or more hours above treeline on an open ridge, and summer storms often build by late morning.
Turnaround
If you are not on the east ridge crest by 10 a.m., or clouds are towering over the ridge, turn around. Be off the summit by noon at the latest.
Crux
The long, steady climb up the east ridge. It is never hard, but the rock gets rougher and the summit keeps looking closer than it is.
Route-finding
The forest trail is easy to follow. Above treeline you pick your own line to the ridge. In clouds the broad ridge can be confusing on the way down, so note where you came up onto it.
Water
Grays Creek runs beside the lower trail. There is little or no reliable water above treeline. Filter or treat anything you take from the creek.
From Poncha Springs, drive south on US 285. At Mears Junction, a few miles before Poncha Pass, turn right (west) onto the Marshall Pass road, County Road 200. If you reach the top of Poncha Pass, you went too far. The Grays Creek trailhead is reached from this road system on the east side of the peak. Several forest roads branch off here, so load the trailhead on a map or GPS before you lose cell signal.
The main Marshall Pass road is graded gravel and fine for most cars when dry. Side roads toward the trailhead can be rougher, and a higher-clearance vehicle is the safer choice. Check current road conditions with the forest service before you go.
Trail in the treesScramblingTundraRidgeTalus and screeExposed to lightning
The line is elevation, the band underneath is the ground, and the numbered dots match the steps below. Mileage and elevations are approximate.
1
Grays Creek trailhead 9,700' · 0 mi
Start on the trail heading west into the Grays Creek drainage. The path climbs gently at first through mixed forest. Sign in at any register and make sure someone knows your plan, since this is a quiet side of the range.
2
Lower Grays Creek 10,200' · 0.6 mi
The trail follows the creek upstream. You will hear water close by. The grade is moderate and the tread is mostly dirt with some roots and rocks.
Watch for: Keep to the main trail where old paths or game trails split off.
3
Upper forest 10,700' · 1.2 mi
The valley narrows and the trail steepens. Trees start to thin and you get glimpses of the high ground above. This is a good place to fill water if you need it.
4
Steeper slopes 11,200' · 1.8 mi
The grade picks up as you work toward the edge of the trees. The forest opens into small meadows. Keep heading generally west and uphill toward the open slopes below the east ridge.
Watch for: Take a mental note of where you leave the trees so you can find this spot on the way down.
5
Treeline 11,700' · 2.3 mi
The trees end and the view opens up. Ahead is open tundra rising to the long east ridge. From here on there is little shelter from wind or lightning.
Watch for: Check the sky here. If clouds are already building, this is the easy place to turn back.
6
Tundra slopes 12,300' · 2.9 mi
Walk up grassy tundra mixed with embedded rock. Pick the easiest line toward the ridge crest. The footing is good when dry but slick when wet.
7
East ridge crest 13,000' · 3.6 mi
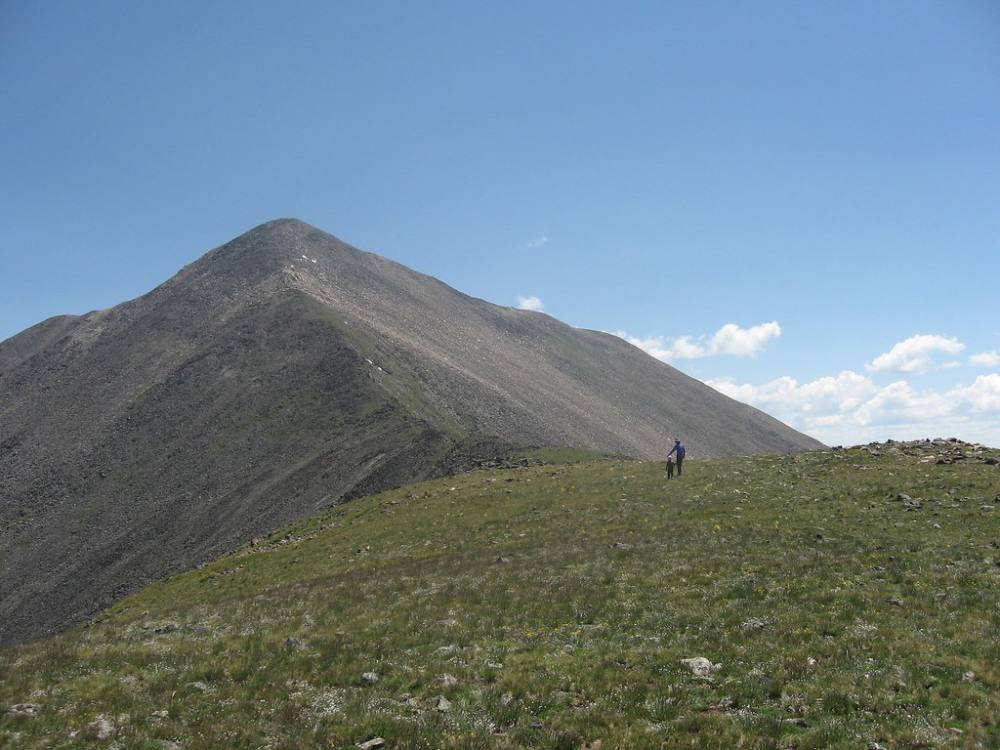
Gain the crest of the east ridge. The ridge is broad and runs west toward the summit. Off to the side, the ground drops sharply into the Devil's Armchair, a huge bowl-shaped cirque.
Watch for: Stay back from the edge above the cirque, especially in wind or when snow cornices linger.
The grassy ridge up Mount Ouray · Photo: s_mestdagh
8
Mid ridge 13,400' · 4 mi
Follow the ridge west over gentle rises. Tundra gives way to more loose rock and talus. Go around any rock outcrops on easy ground rather than climbing over them.
9
Upper ridge 13,700' · 4.35 mi
The last stretch is rockier and slower. Step carefully on talus that can shift under your feet. The summit hump is ahead; it often takes longer to reach than it seems.
Watch for: Loose talus. Test big rocks before you trust them.
10
Summit 13,979' · 4.65 mi
The summit is wide and rocky. You can see down the length of the Sawatch to the north and across the San Luis Valley to the Sangre de Cristo Range. Look back east and pick out your ascent line before you start down.
Watch for: Do not linger if weather is building. You still have a long exposed ridge to walk back.
Landmarks to know
Grays Creek alongside the lower trail
Forest thinning into small meadows before treeline
Open tundra slopes rising to a long, broad ridge
The Devil's Armchair cirque dropping away beside the upper ridge
Tundra turning to loose talus on the final ridge
A wide, rocky summit with views of the San Luis Valley and Sangre de Cristos
Getting down
Go back down the east ridge the way you came. The ridge is wide, and in clouds it is easy to drift off to one side. Keep the drop into the Devil's Armchair well to one side and do not start down a slope until you are sure it leads to the spot where you left the trees.
Tired legs and loose talus cause most slips on the way down. Take the rocky upper ridge slowly. Once you reach treeline, find the trail again before dropping further into the forest rather than bushwhacking straight down the drainage.
If things go wrong
The only real escape is back down the way you came. If a storm moves in while you are on the ridge, get off the crest and head down the tundra slopes toward treeline as fast as you safely can. Do not shelter under lone rocks on the ridge. If someone is hurt, keep them warm and out of the wind, send someone to a spot with cell coverage if you have none, and call 911. Rescue on this side of the peak can take many hours.
3D flyover
Press play to fly the East Ridge. The graph shows elevation along the way and how much you gain each mile. Open full screen.
For planning only. The line is traced from open map data, not walked in the field, and off-trail parts are drawn straight. Load it in your GPS app to see the route, but navigate with your eyes, a map and the route description.
See the trail on video
A climb of this route filmed by The Virtual sherpa. The video belongs to them and only plays when you press play.
This describes the route on a dry summer day. Snow, ice, a washed-out road or an afternoon storm can make it a very different climb. Check recent conditions the week you go and turn around when the day tells you to.