Afternoon storm risk is the line that matters. Everything else is comfort. In summer, plan to be off the ridge before the build-up starts, not as it starts. Forecast for the summit point, adjusted for its elevation · data from Open-Meteo.
This is a technical climb. Falls here can be fatal. It is for experienced climbers who are comfortable on steep, exposed rock and can decide when to turn back.
Combo route · Little Bear + Blanca Traverse
Overview
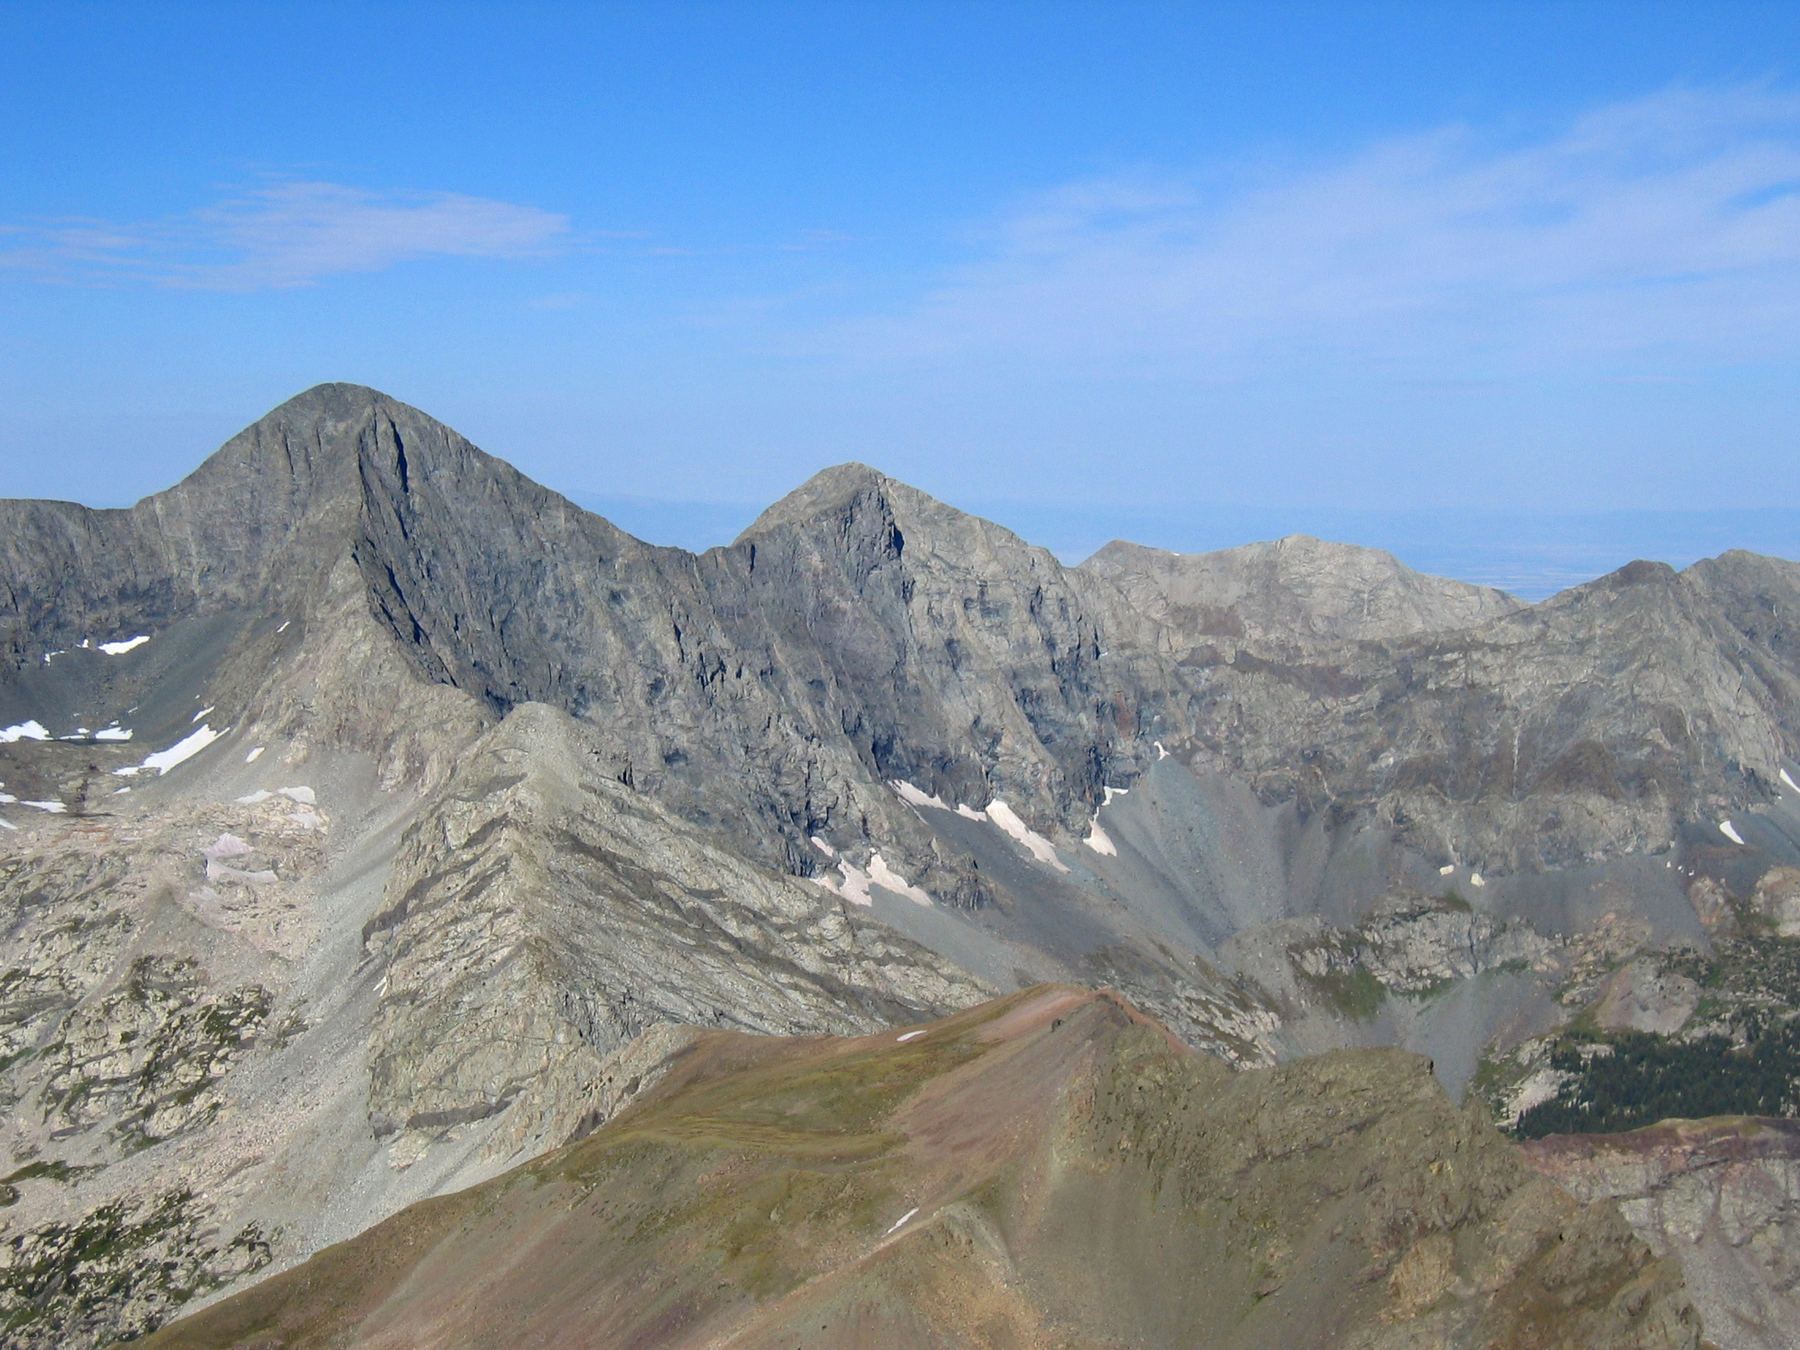
This is a link-up of Little Bear Peak and Blanca Peak by way of the ridge that joins them. You first climb Little Bear, most often via the West Ridge and Hourglass, its standard route. Then you cross the jagged ridge over a mile northeast to Blanca, and descend Blanca's Northwest Ridge back to Lake Como.
It is one of the most serious ridge traverses in Colorado. Our listing rates it Class 5. Much of it is sustained Class 4 with severe exposure on both sides, including steep downclimbs, a long stretch of small towers, and a narrow ledge called the Catwalk. It is only for very experienced climbers who are solid on exposed rock. Little Bear's own standard route is already one of the hardest 14ers.
The whole day is about 17 miles with 8,000 feet of gain from the lower road. The traverse alone takes most people at least 3 hours. Most parties camp at Lake Como and plan a very long day.
Plan of the day
Start by
Before dawn from Lake Como, often by 4 a.m. Only start the traverse with a clear forecast.
Turnaround
Decide on Little Bear's summit. If it is late morning, or any clouds are building, do not start the traverse. Once past the first downclimb, going back is hard.
Crux
The steep Class 4 downclimb right off Little Bear, then the first quarter mile of small towers with constant exposure. Later, the Catwalk on the second large tower.
Route-finding
Hard. The ridge has many towers and bypasses. Cairns help in places, but you must read the terrain all the way.
Water
Lake Como and streams on the approach. None on the ridge. Carry 3 to 4 liters from camp.
East of Alamosa, leave U.S. 160 and head north on Colorado 150 toward Great Sand Dunes. After a little over 3 miles, turn right onto the Lake Como road.
How far you can drive depends on your vehicle. Most cars stop after about 1.5 miles. 4WD SUVs and trucks can usually reach pull-offs near 8,800 feet, about 3.25 miles up. Above that the road is extremely rough. Only modified vehicles, ATVs or UTVs go much higher.
RoadTundraRidgeScramblingExposed to lightning
The line is elevation, the band underneath is the ground, and the numbered dots match the steps below. Mileage and elevations are approximate.
1
Lower Lake Como road 8,000' · 0 mi
Park where your car can go and hike up the rough road. It is steep, rocky and hot in the sun.
2
4WD pull-offs 8,800' · 1.75 mi
Many people park here. From this point it is about 4 miles to Lake Como.
3
Lake Como 11,750' · 5.9 mi
Most parties camp near the lake the night before. Get water here.
Watch for: Treat all water.
4
Hourglass on Little Bear 13,500' · 7.1 mi
Climb Little Bear via the West Ridge and Hourglass, its standard route. The Hourglass is a steep, narrow gully known for rockfall.
Watch for: Wear a helmet. Rockfall here is a serious danger.
5
Summit of Little Bear Peak 14,041' · 7.4 mi
This is the first summit. Blanca is over a mile to the northeast, but the first quarter mile of hard ridge is hidden from here.
Watch for: Only go on if you feel strong and the sky is clear.
6
Bottom of the first downclimb 13,800' · 7.5 mi
Head north off the summit along the ridge. It soon turns into a steep Class 4 downclimb with big drops on both sides. Stay on or near the crest down to a saddle. Near the bottom you must make moves above a large drop on your left.
Watch for: If this section felt too much, go back up and descend Little Bear the way you came.
7
Small towers 13,850' · 7.7 mi
The ridge runs over many small towers, one after another. Expect frequent downclimbs and narrow spots with little break from exposure. In one place a short bypass is marked by a cairn about 30 feet below you, to the left. Right after it comes another exposed Class 4 downclimb.
Watch for: This first quarter mile is slow and tiring.
8
Captain Bivwacko Tower 13,850' · 7.85 mi
This small tower blocks the ridge. Go around it on the left (north) side. The path is narrow and above big exposure.
Watch for: At this point you have done a bit more than a quarter of the traverse.
9
The Highway 13,800' · 8 mi
Cross slabs and climb and downclimb a few steep, angled steps. Then reach the Highway, a stretch with fewer ups and downs. It has one narrow, exposed spot.
10
Mid-traverse rock fields 13,650' · 8.2 mi
At the east end of the Highway, go down ledges on the south side to a notch. Climb onto a wall and work around an exposed corner marked by a cairn. Continue on ledges and across gullies on the south side to the rock fields at the lowest point of the traverse.
11
Three large towers 13,900' · 8.45 mi
Cross the rock fields and a rock rib. Pass below the first tower on its right, keeping your height. Climb the second tower on solid rock and cross the Catwalk, a narrow, level, very exposed section. Go down to the saddle, then climb over the third tower and down its east end.
Watch for: The Catwalk is very exposed. Move slowly and carefully.
12
Summit of Blanca Peak 14,350' · 8.6 mi
From the last saddle, scramble up the final, easier pitch to Blanca's summit. You can look back at the whole traverse.
Getting down
Descend Blanca Peak's Northwest Ridge route, which is Class 2. It drops toward the lakes above Lake Como and then follows the trail back down to Lake Como. From there, walk the long, rough road back to your car. Do not go back across the traverse.
If things go wrong
The only real decision point is Little Bear's summit. After the first downclimb, escape off the ridge is not practical on most of the route. The faces on both sides are steep and dangerous. If you must turn back early, climb back up the first downclimb to Little Bear and go down its standard route. Past the midpoint, it is usually best to push on to Blanca and use its easier descent. In an emergency, call 911 if you have signal. A rescue on this ridge would be very difficult and slow.
Little Bear + Blanca Traversethis routeClass 5 17 mi
Gash RidgeClass 4–5
Conditions change the route
This describes the route in its usual season. Distances and elevations are close estimates for planning. Snow, ice, rockfall, a washed-out road or an afternoon storm can make it a very different climb. Check recent conditions the week you go and turn around when the day tells you to.