Afternoon storm risk is the line that matters. Everything else is comfort. In summer, plan to be off the ridge before the build-up starts, not as it starts. Forecast for the summit point, adjusted for its elevation · data from Open-Meteo.
Standard route · East Slopes
Overview
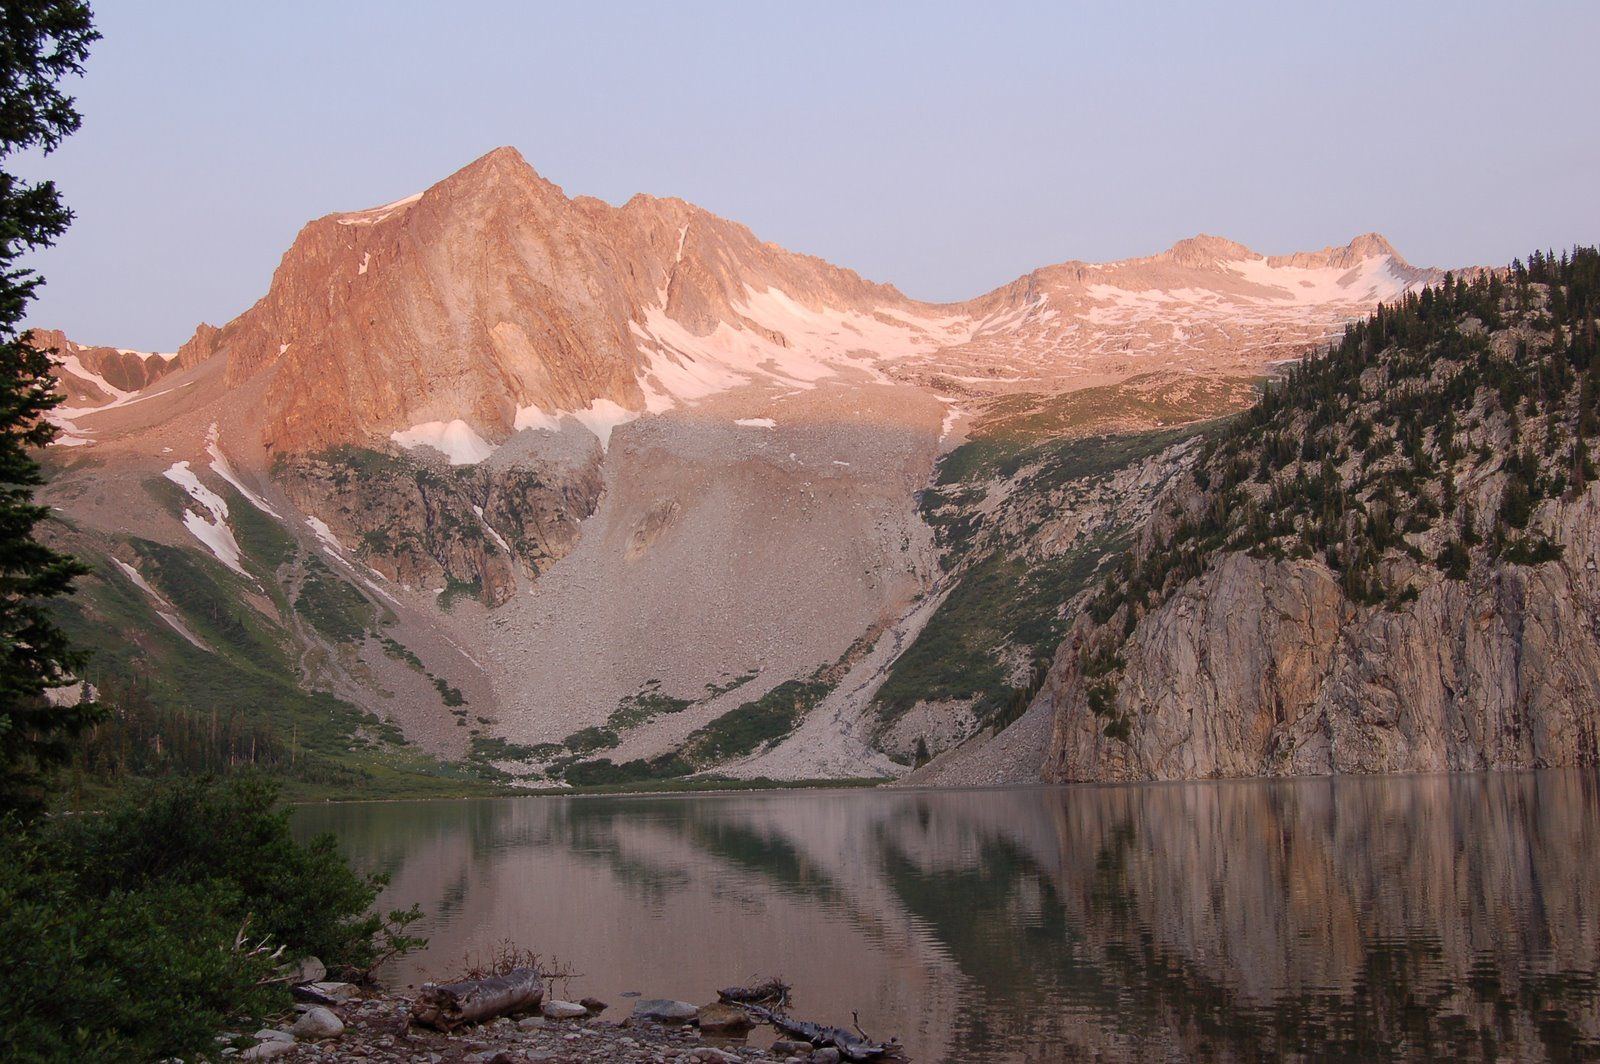
Snowmass Mountain is one of the most remote fourteeners in the Elk Range. It is named for the large snowfield on its east side, and the standard route climbs that snowfield to reach a rocky ridge. It starts with a long hike of about 8 miles up Snowmass Creek to Snowmass Lake. From the lake you climb past a boulder field and up a steep drainage to the snowfield, cross it to reach the southeast ridge, and then scramble about a third of a mile of Class 3 rock to the top.
Most people do this as an overnight trip, camping near the lake and climbing the next morning. The full round trip from the car is about 22 miles. A one-day push is possible but very long. From the lake to the summit and back usually takes 6 to 9 hours.
This route is for experienced scramblers. The Elk Range rock is loose, and the final ridge has exposure and plenty of rocks that move. The snowfield is easier when it still holds snow, but that snow can be icy in the early morning. You need to be comfortable with steep snow, loose Class 3 rock and a long retreat if something goes wrong.
Plan of the day
Start by
Leave camp at the lake by 4:30 or 5 a.m. The snow is firm early and storms build over the Elks by late morning.
Turnaround
If you are not on the ridge crest at 13,700 feet by 10 a.m., or clouds are building, turn around. The ridge to the summit still takes about an hour each way.
Crux
The Class 3 scramble along the southeast ridge, especially crossing the rock rib and the loose final pitch just below the summit.
Route-finding
The trail to the lake is clear. Above the lake, the route through the boulder field and up the drainage takes care; watch for cairns. On the ridge the route weaves on and off the crest, and it is easy to get onto harder, looser rock.
Water
Snowmass Creek runs along the approach trail, and the lake and its outlet are good sources at camp. Filter or treat all water. There is runoff from the snowfield in summer, but do not count on it; carry 2 to 3 liters from the lake.
Head south from Glenwood Springs on Highway 82 for about 27 miles until you reach the small town of Snowmass. There, go right on Snowmass Creek Road and zero your trip meter. At 1.7 miles, turn left to stay on Snowmass Creek Road. The pavement ends at about 7 miles. At 10.7 miles, go left and drive over a bridge across the creek. At another junction at 10.9 miles, go right, then continue to where the road ends at the trailhead, about 11.3 miles from the highway.
The dirt road is usually fine for passenger cars when dry. The route enters the Maroon Bells-Snowmass Wilderness. A reservation is required to camp in the Snowmass Lake area and spots are limited in summer. If you cannot get one, the options are to climb it as a very long day hike or to camp outside the permit zone, about 2 miles below the lake near the log jam.
Trail in the treesTalus and screeScramblingRidgeExposed to lightning
The line is elevation, the band underneath is the ground, and the numbered dots match the steps below. Mileage and elevations are approximate.
1
Snowmass Creek trailhead 8,400' · 0 mi
Hike south up the Snowmass Creek trail through aspen and meadows. In the first mile you pass through one or more livestock gates; close them behind you.
2
West Snowmass junction 8,900' · 2.5 mi
The West Snowmass trail branches off here. Keep left on the Maroon-Snowmass trail as it continues up the valley beside the creek.
Watch for: Stay left here.
3
First view of Snowmass 9,300' · 4 mi
Around 4 miles in, the valley opens and Snowmass Mountain comes into view to the southwest, with its big white snowfield below the summit.
4
The log jam 10,050' · 6.3 mi
Above 10,000 feet you reach a pile of logs at the north end of a string of ponds. After spring runoff it is the way across the creek. Cross slowly and test each log.
Watch for: Logs shift and can be slippery. In high water this crossing is dangerous.
5
Switchbacks above the ponds 10,350' · 6.8 mi
On the west side of the ponds, the trail winds south, turns right and switchbacks up a slope before going back into the forest.
6
Trail junction below the lake 10,800' · 7.9 mi
About a mile past the switchbacks you reach a junction. Continue straight toward the lake.
7
Snowmass Lake outlet 10,980' · 8.5 mi
Arrive at the stream flowing out of the east side of Snowmass Lake. Campsites are on both sides of the stream. The peak rises beyond the far end of the lake.
Watch for: Camping here requires a reservation.
8
Lake shore trail 11,000' · 8.8 mi
Cross to the south side of the outlet and walk through a short patch of forest to a clearing on the shore, where you can see the whole route. Pick up a trail heading southwest along the lake through willows and open areas.
9
Boulder field at the west end 11,100' · 9.3 mi
Reach a boulder field at the far west end of the lake. Follow cairns through the rocks toward the gully and stream that drain the snowfield above.
Watch for: Boulders can shift. Watch your footing.
10
Avoid the loose pitch 11,600' · 9.6 mi
Near 11,600 feet the gully gets steep and loose. Cross the stream and climb up through willows and rock ledges on the other side instead.
Watch for: Do not climb the steep, loose pitch straight up the gully.
11
Bottom of the snowfield 12,000' · 9.9 mi
Around 12,000 feet the ground eases and you reach the lower edge of the snowfield. Look for the summit in the distance and a large bump on the southeast ridge to its left.
Watch for: Snow may be hard and icy early. Use an ice axe and crampons if so.
12
Flat area above 13,000 feet 13,050' · 10.4 mi
Climb about half a mile up the snowfield (or talus if it has melted) to another flat area just above 13,000 feet. Then head west toward the bump on the ridge.
13
Southeast ridge crest 13,700' · 10.7 mi
Aim for a break to the left of some cliffs below the bump. Climb moderate snow or big rocks to the ridge crest at 13,700 feet. The summit is about a third of a mile away.
Watch for: Late-season rock here is very loose.
14
Rock rib 13,950' · 10.9 mi
Move over to the ridge's west side, go right, and traverse just under the crest. About halfway to the summit, it can be easier to stay right on the crest. Then drop back just below the crest toward a high point with a rock rib on your left. Find a gap in the rib and scramble through it.
Watch for: Class 3 with exposure. Test every hold.
15
Summit 14,105' · 11 mi
Traverse below large rocks to the final pitch and climb it with care; there is a lot of loose rock. The summit looks down on Snowmass Lake and across to Capitol Peak to the north.
Watch for: Loose rock on the final pitch. Watch for climbers below you.
Here West Snowmass Trail goes off to the right. Keep going straight on Maroon-Snowmass Trail.
Coming down: Keep going straight on Maroon-Snowmass Trail. Don’t take West Snowmass Trail.
2Mile 9.0 · 11,040'
Stay on Maroon-Snowmass Trail
Here FR 1975.1A goes off to the left. Keep going straight on Maroon-Snowmass Trail.
Coming down: Keep going straight on Maroon-Snowmass Trail. Don’t take FR 1975.1A.
3Mile 9.4 · 11,270'
Turn right
Here an unmarked path goes off to the left. Turn right to follow the trail.
Coming down: Turn left to stay on Maroon-Snowmass Trail. Don’t take the unmarked path.
Landmarks to know
Livestock gates in the first mile on the Snowmass Creek trail.
West Snowmass junction at about 2.5 miles: stay left.
The log jam at the north end of a line of ponds, above 10,000 feet.
Snowmass Lake with campsites at its east outlet.
Boulder field at the west end of the lake.
The large snowfield, with a bump on the southeast ridge to the left of the summit.
Ridge crest at 13,700 feet, then a rock rib with a gap just before the summit.
Getting down
Reverse the route along the ridge. Go slowly: the ridge has loose rock, and it is easy to miss the gap in the rock rib or to stay too low on the west side. Back at the ridge crest near the bump, find the break left of the cliffs you came up. Do not start down any gully until you are sure it is the right one.
On the snowfield, the snow is often soft by midday; plunge-step down or glissade only if you can see a clear runout and have an ice axe. Below 12,000 feet, stay on the side of the stream you came up and avoid the steep, loose pitch in the gully. From the lake, the hike out is long; cross the log jam with care, especially when tired or when the water is high in the afternoon.
If things go wrong
Before the ridge crest, retreating is simple: go back down the snowfield to the lake. Once on the ridge, the only safe way off is back the way you came; the other sides of the ridge are steep and loose. If a storm moves in, get off the ridge and down the snowfield as fast as is safe. Camp at the lake is the nearest shelter, and it is a long way from any road. If someone is hurt, keep them warm and still and send a strong hiker out to the trailhead, about 8 miles away. Rescue from here can take a full day. Carry a satellite messenger if you can, and call 911 if you get a signal.
3D flyover
Press play to fly the East Slopes. The graph shows elevation along the way and how much you gain each mile. Open full screen.
For planning only. The line is traced from open map data, not walked in the field, and off-trail parts are drawn straight. Load it in your GPS app to see the route, but navigate with your eyes, a map and the route description.
See the trail on video
A climb of this route filmed by The Virtual sherpa. The video belongs to them and only plays when you press play.
Jump to
Other routes
All 3 routes up Snowmass Mountain, with the class and round-trip distance for each.
Class 3 means sustained scrambling with your hands, on terrain where a fall has real consequence. Build up on easier scrambles first, wear a helmet, go with someone who has led this kind of ground, and remember that downclimbing is harder than going up.