Afternoon storm risk is the line that matters. Everything else is comfort. In summer, plan to be off the ridge before the build-up starts, not as it starts. Forecast for the summit point, adjusted for its elevation · data from Open-Meteo.
Standard route · West Ridge and Hourglass
Overview
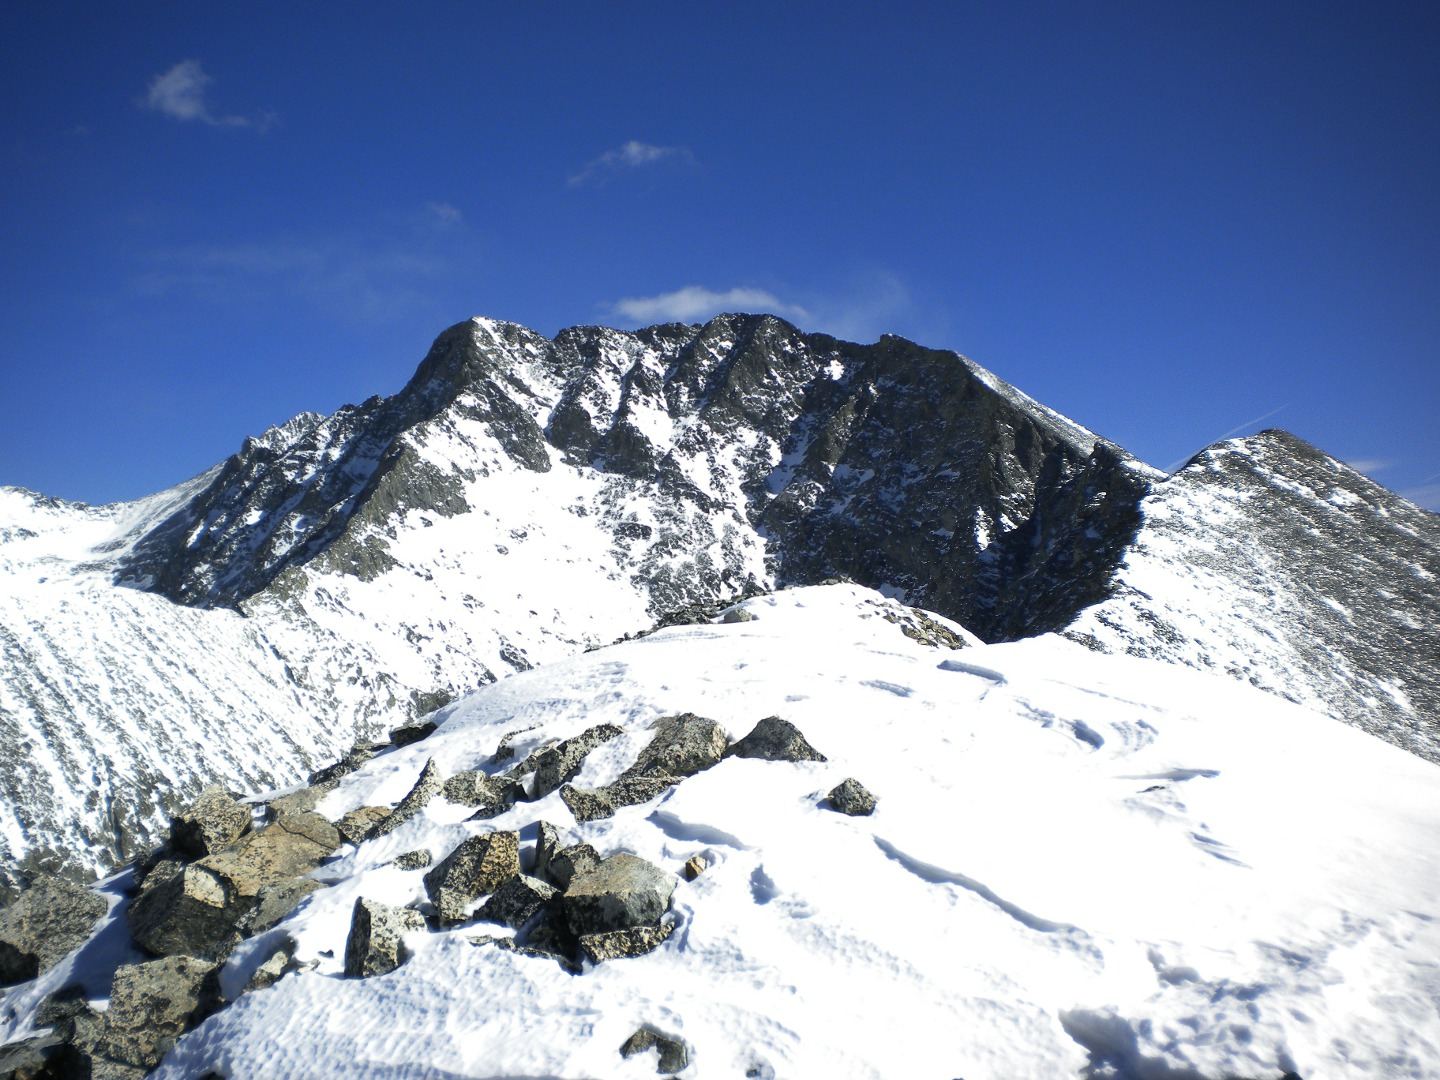
Little Bear Peak rises above Lake Como in the Blanca group of the Sangre de Cristo range. Its standard route is one of the most dangerous in Colorado. After a long, punishing walk up the Lake Como road, you climb a steep, loose gully to the west ridge, traverse below the ridge to the base of a narrow gully called the Hourglass, and then climb Class 3 and 4 rock to the summit.
The Hourglass is the heart of the danger. It is steep, the rock in its narrow middle is smooth and often wet, and the whole face above it holds loose rock. Anything knocked off above funnels straight down the gully onto anyone below. There is no good place to hide once you are in it. The more people on the route, the higher the risk. Avoid busy weekends, keep your party close together, and move through the narrow part quickly.
From the lowest parking the round trip is 14 miles with about 6,200 feet of gain. From Lake Como it is about 3.5 miles and 2,300 feet, so most people camp at the lake. This route is only for experienced climbers who are comfortable on steep Class 4 rock, can move well on loose ground, and can turn back when conditions are not right.
Plan of the day
Start by
From a camp at Lake Como, leave by 4:30 or 5 a.m. You want to be through the Hourglass before other parties are above you and long before storms. Starting from the car in one push is not a good idea for most people.
Turnaround
At the base of the Hourglass (about 13,300 feet), stop and look at the time, the sky and who is above you. If you cannot reach the summit and get back to this spot before weather arrives, or if people are already in the upper Hourglass, do not go up. As a rule, be at the Hourglass base by 9 a.m.
Crux
The Hourglass: a narrow, steep gully of smooth, often wet rock, followed by steep Class 3 and 4 climbing on a face littered with loose rock, all with high rockfall danger.
Route-finding
Hard. The entry gully to the west ridge starts from a cairn above Lake Como and can be hard to find. The traverse to the Hourglass follows cairns and faint trail below the ridge. Above the Hourglass there are two main lines and many small choices. Pick your line carefully and remember it for the descent.
Water
Lake Como and the streams near it are the last water. You cross a stream just after leaving the road at about 11,900 feet. There is none on the ridge or face. Filter or treat.
Low-clearance cars park at the absolute desert bottom (8,000'). The road itself is the most notoriously destructive 4WD track in Colorado.
Terrain
A hot, dusty desert track transitioning into a steep pine forest, rugged alpine lakes, and slick, near-vertical rock chimneys.
You begin with a grueling, hot, low-altitude march up a road lined with sharp volcanic rocks and axle-breaking boulders. As you painfully grind upward, the desert sagebrush slowly gives way to pine forest, and the grade turns unforgivingly steep. You pass pristine alpine lakes nestled under sheer rock walls before arriving at Lake Como. Above the lake, the hiking shifts to highly rugged terrain. For Blanca or Ellingwood, you pick your way through a massive basin of sharp talus to ascend a steep, rocky ridge. For Little Bear, you leave the trail entirely to scale a brutally steep gully of loose rock before entering "The Hourglass"—a smooth, steep, water-grooved rock chimney requiring an intense Class 4 scramble on all fours up slick, high-exposure stone.
From US 160 east of Alamosa, turn north on Colorado 150 toward Great Sand Dunes National Park. Drive a little over 3 miles and turn right onto the Lake Como road (also called the Blanca Peak road). How far you get depends on your vehicle. Most cars can go about 1.5 miles to around 8,000 feet before the road gets rough.
Stock 4WD SUVs and trucks can creep up to several pull-offs near 8,800 feet, which is a popular place to park. Above that the road is one of the worst in the state, with large rock steps. Small, high-clearance 4WD vehicles may reach about 10,000 feet, but there are very few places to park. Only modified jeeps, rock crawlers and ATVs or UTVs can reach Lake Como, and only with a skilled driver. Many people park low and backpack to the lake.
ScramblingRoadTundraRidgeExposed to lightning
The line is elevation, the band underneath is the ground, and the numbered dots match the steps below. Mileage and elevations are approximate.
1
Lower Lake Como road 8,000' · 0 mi
Walk up the rocky road across dry, open hillside with little shade. The Blanca massif looms ahead.
Watch for: Hot and dry. Start early if hiking in with a heavy pack.
2
Pull-offs near 8,800 feet 8,800' · 1.4 mi
Where most 4WD trucks park. Above here the road gets much rougher, with big rock ledges and loose cobbles.
3
Upper road 10,000' · 3 mi
The road climbs steadily through forest and rock outcrops. It is rough on the ankles; take your time.
4
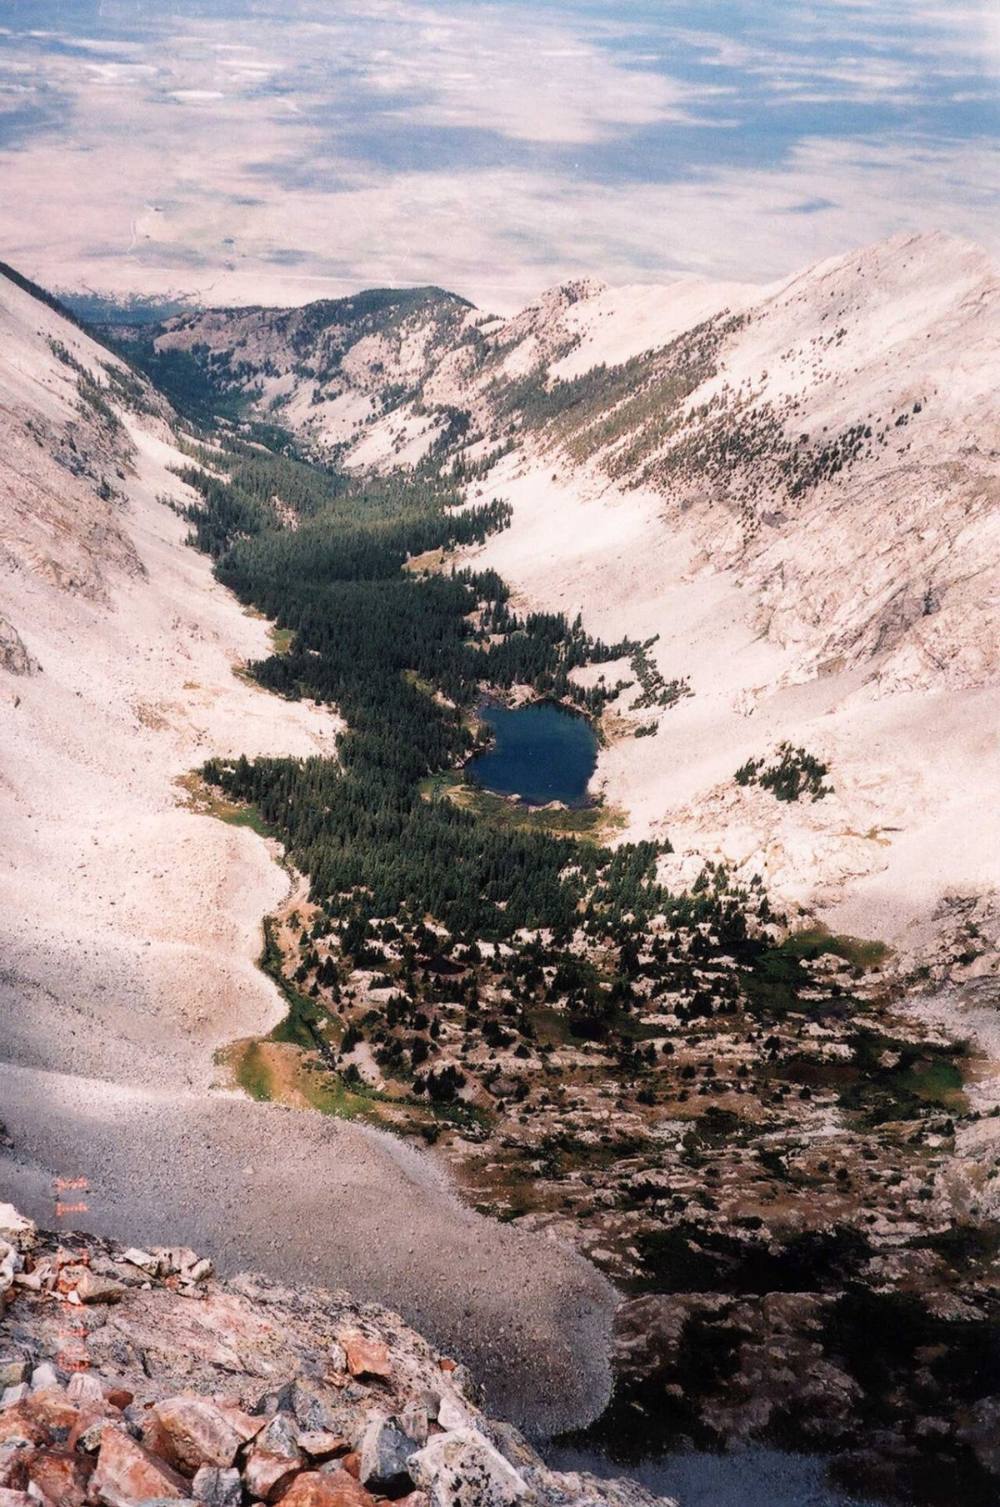
Lake Como 11,750' · 5.25 mi
The lake sits in a basin with Little Bear towering to the east. Look at Little Bear's west ridge and find the gully that leads up to a notch in it; that is your way onto the ridge.
Lake Como · Photo: Alethe88
5
Leave the road 11,900' · 5.45 mi
Keep following the road as it circles the lake and heads into the trees again. Once you come out of the forest, the road dips a little; watch for a cairn to your right. That is where you leave the road and cross the stream.
Watch for: Easy to miss in the dark. Scout it the day before if you can.
6
Talus below the gully 12,000' · 5.55 mi
Follow cairns onto a pile of talus. At about 12,000 feet the gully comes into view. Cross the talus toward it.
7
Gully to the west ridge 12,300' · 5.7 mi
Climb into the gully following cairns and faint trail. It is steep and loose. The right side is usually the easiest way up.
Watch for: Rolling rocks onto people below. Stay close together.
8
Notch in the west ridge 12,600' · 5.85 mi
Reach a notch in the ridge at the top of the gully. Turn left (east) and climb out of the notch.
9
Bypass the ridge point 12,960' · 6.1 mi
Traverse along the south side of the ridge, mostly below the crest, following cairns and bits of trail. About a quarter mile past the notch, go around a high point on the ridge. The rest of the route comes into view.
10
Traverse to the Hourglass 13,100' · 6.3 mi
Drop slightly to a notch in the ridge with a gully falling away to your right. Keep traversing east with cliffs above you on the left.
11
Base of the Hourglass 13,300' · 6.5 mi
The route so far has been hard Class 2. Here it becomes Class 3 and 4. Look up the narrow gully and check for other climbers, water and ice. Put your helmet on if it is not on already.
Watch for: Decision point. Turn back if weather or other parties make it unsafe.
12
The choke 13,400' · 6.6 mi
Climb the first slabs to a pair of orange rock bands just below the narrowest part. A fixed rope may be in place. Do not trust it unless you can check the whole rope and its anchor. Climb the steep, smooth rock of the choke; if water or ice covers the middle, work along the side.
Watch for: Highest rockfall risk. Do not linger here.
13
Anchor above the choke 13,550' · 6.7 mi
At the top of the steep, smooth section is an anchor area. From here you pick a line: the left side is more solid but more complex; the right side has steep slabs, then a lot of loose rock. In dry conditions, go left. If the face is mostly snow-covered, the right side is better.
14
Left line up the face 13,800' · 6.8 mi
Climb left a short way and follow a band of orange rock toward the west ridge, or just right of the crest. After about 200 feet, angle right away from steep rock on the ridge.
Watch for: Loose rock above the Hourglass. Anything you knock off falls onto climbers below.
15
10-foot wall 13,900' · 6.88 mi
Traverse right to a wall about 10 feet high. Climb it, then move left and continue up. Cairns mark more than one line; choose carefully and remember your route.
16
Summit 14,041' · 7 mi
Steep climbing leads to a small summit. The ridge east toward Blanca drops away sharply. Blanca, Ellingwood and the Lake Como basin are all in view.
Watch for: Do not attempt the ridge to Blanca without knowing what you are doing; it is a much harder climb.
Here a road goes off to the left. Turn right to follow the road.
Coming down: Turn left to stay on the trail you came up. Don’t take the road.
2Mile 1.6 · 8,950'
Turn right to stay on Mount Blanca Road
Here a road goes off to the left. Turn right to follow Mount Blanca Road.
Coming down: Turn left to stay on Mount Blanca Road. Don’t take the road.
Landmarks to know
Lake Como, with Little Bear towering above it to the east.
A cairn on the right where the road leaves the forest past the lake.
A steep, loose gully leading up to a notch in the west ridge.
A high point on the ridge that you go around on its south side.
Cliffs above you on the left as you traverse to the Hourglass.
Orange rock bands just below the narrow choke of the Hourglass.
An anchor area and possible fixed rope at the top of the choke.
A short wall about 10 feet high on the left line near the top.
Getting down
The descent is as dangerous as the climb, and often more so. Go back down the line you came up. On the face above the Hourglass, move slowly, keep your party close together, and do not knock rocks off; people may be climbing below. Face in on anything steep. At the anchor area above the choke, many parties rappel or use a belay down the smooth, steep rock rather than down-climbing it wet or tired.
Below the Hourglass, the traverse back to the west ridge notch is on faint trail. Keep the cliffs on your right this time and follow the cairns. At the notch, turn right and go down the loose gully to the talus and the road above Lake Como. Do not drop down the gully you passed at the ridge notch closer to the Hourglass; it is not the route. The walk out on the road is long and rough on tired legs.
If things go wrong
The base of the Hourglass is the main decision point, and turning around there is often the right call. The traverse and the gully back to Lake Como are loose but manageable, and the lake area is the nearest safer ground. Once above the Hourglass there is no easy way off; the only way down is back through it. If a storm arrives while you are high on the face, do not rush; a fall or dislodged rock is as deadly as lightning. Get down carefully, and get out of the Hourglass as soon as you can, since water will pour down it in rain. If someone is hurt, get everyone else out of the rockfall path first, keep the injured person warm, and call 911 if you can get a signal. A rescue here is technical and slow.
3D flyover
Press play to fly the West Ridge and Hourglass. The graph shows elevation along the way and how much you gain each mile. Open full screen.
For planning only. The line is traced from open map data, not walked in the field, and off-trail parts are drawn straight. Load it in your GPS app to see the route, but navigate with your eyes, a map and the route description.
See the trail on video
A climb of this route filmed by Vo2maxProductions. The video belongs to them and only plays when you press play.
Jump to
Other routes
All 4 routes up Little Bear Peak, with the class and round-trip distance for each.
Widely considered the most demanding, terrifying, and sustaining standard traverse in the state. After surviving the Hourglass on Little Bear, you step onto a mile-long, exceptionally exposed, jagged rock ridge. The ridge narrows down to widths of less than two feet in several places, forcing you to maintain absolute balance over crumbling towers and sheer drops for hours until you reach the solid granite of Blanca.
Do not make this an introduction to anything
Class 4 is exposed climbing where a slip is likely fatal and the rock is often loose. This demands prior Class 3 and Class 4 experience, flawless route-finding, a helmet and a partner who knows the line. Treat any trip report, including this one, as one person’s day rather than a guarantee of yours.